Introduction
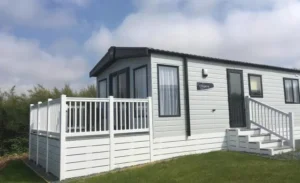
a. Brief about the importance of a caravan skylight: Skylights in a caravan are not merely a source of natural light but also play a pivotal role in ventilation, enhancing the overall living experience during your travels. The influx of sunlight not only brightens up the space but also helps in maintaining an energetic and vibrant environment inside the caravan. Moreover, skylights can provide an additional avenue for enjoying the scenic beauty during your journeys, offering a window to the sky and landscapes above.
b. Reasons why one might need to replace a skylight: Skylights may need replacement for various reasons, such as wear and tear, accidental damage, or to upgrade to a better model. Over time, skylights can become cloudy, hindering the view and reducing the amount of light entering the caravan. Furthermore, a damaged skylight might lead to leaks, which can cause extensive damage to the interior of the caravan, making timely replacement crucial to prevent further issues.
Understanding Skylight Types
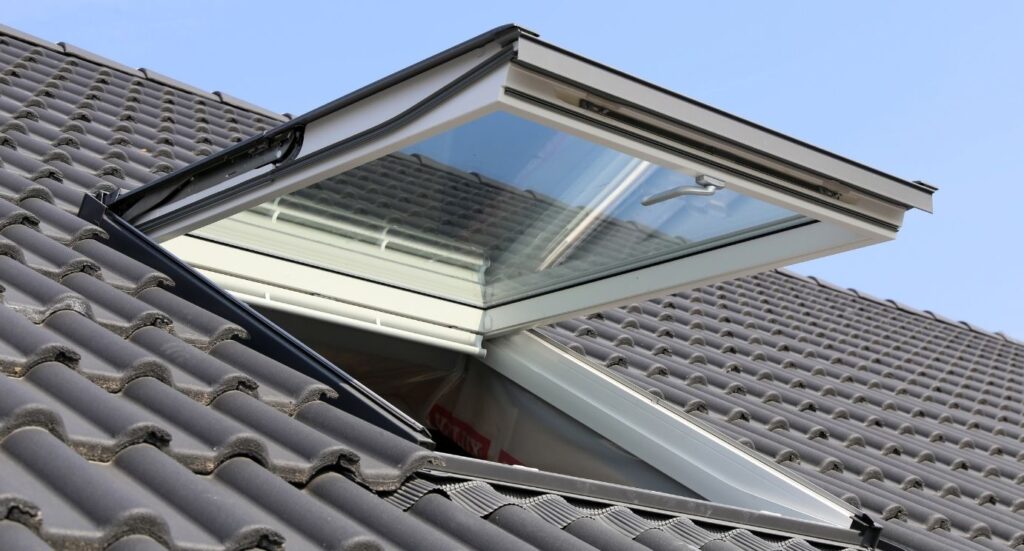
a. Different types of caravan skylights: Caravan skylights come in various shapes, sizes, and functionalities, each designed to cater to specific needs and caravan models. Some skylights are designed to provide maximum light, while others might focus more on ventilation. Understanding the different types, such as vented, fixed, or tubular skylights, is crucial to make an informed decision when considering a replacement, ensuring that it aligns with your needs and preferences.
b. Identifying the type installed in your caravan: Identifying the type of skylight installed in your caravan involves examining its features, such as the opening mechanism, shape, and size. Knowing the exact model and type is vital when purchasing a replacement to ensure compatibility and to ascertain that the new skylight will fulfill the desired functions, such as providing adequate lighting and ventilation, while fitting perfectly into the designated space.
Signs That Your Skylight Needs Replacing
a. Physical damage: Physical damage to a caravan skylight, such as cracks, chips, or broken seals, can compromise its integrity and functionality. Cracks and chips can allow water to seep through, potentially damaging the caravan’s interior. Moreover, physical damage can also impair the skylight’s aesthetic appeal, diminishing the overall look and feel of the caravan, and thus warranting a replacement.
b. Wear and tear over time: Over time, skylights may exhibit wear and tear due to constant exposure to various weather conditions, such as sunlight, rain, and snow. This wear might manifest as discoloration, warping, or a weakened structure, which can reduce its effectiveness in providing light and maintaining an airtight seal. Recognising these signs early can prevent potential damage and ensure that the replacement is conducted in a timely manner.
Materials and Tools Required
a. List of materials needed for replacement: Replacing a caravan skylight necessitates various materials, such as a new skylight, sealant, screws, and possibly replacement trim or cladding. Ensuring that all materials are of high quality is paramount to guarantee the longevity and durability of the new installation. It’s also crucial to ensure that the replacement skylight is of the correct size and type to ensure a smooth installation process.
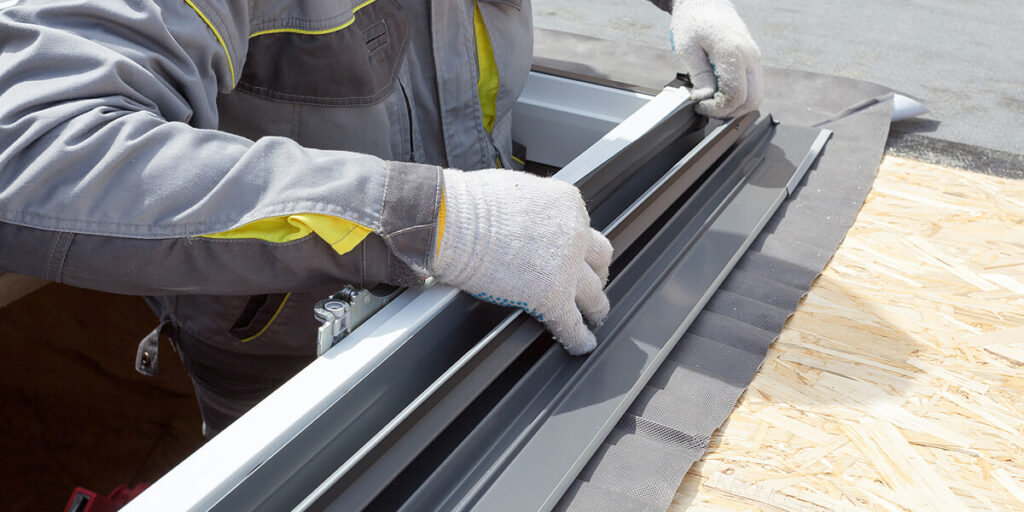
b. Necessary tools and their uses: A successful skylight replacement requires specific tools, such as a screwdriver, sealant applicator, utility knife, and possibly a ladder or steps for easy access. Each tool plays a vital role in the removal and installation process, such as unscrewing the existing skylight, applying sealant to prevent leaks, and safely accessing the installation area, ensuring a secure and efficient replacement process.
Safety Precautions
a. Ensuring safety while working on the skylight: Working on a caravan skylight, especially if it involves climbing onto the roof, demands adherence to safety protocols. Utilizing a stable ladder or platform, wearing non-slip shoes, and ensuring the work area is dry and free from obstacles are pivotal to prevent accidents. Additionally, it’s advisable to have a second person to assist and ensure stability during the replacement process.
b. Protective gear and safe practices: Employing protective gear, such as gloves and safety glasses, can safeguard against potential injuries during the replacement process. Furthermore, adhering to safe practices, such as disconnecting any electrical components connected to the skylight and ensuring that the work area is adequately secured, contributes to a safe and accident-free working environment, protecting both the individual and the caravan from potential harm.
Step-by-Step Replacement Guide
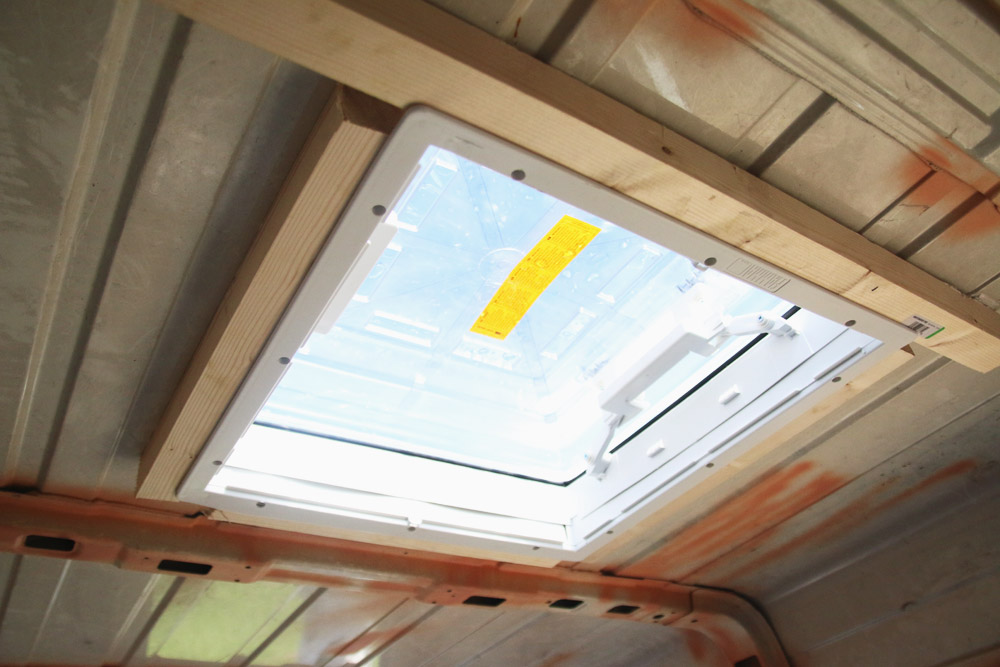
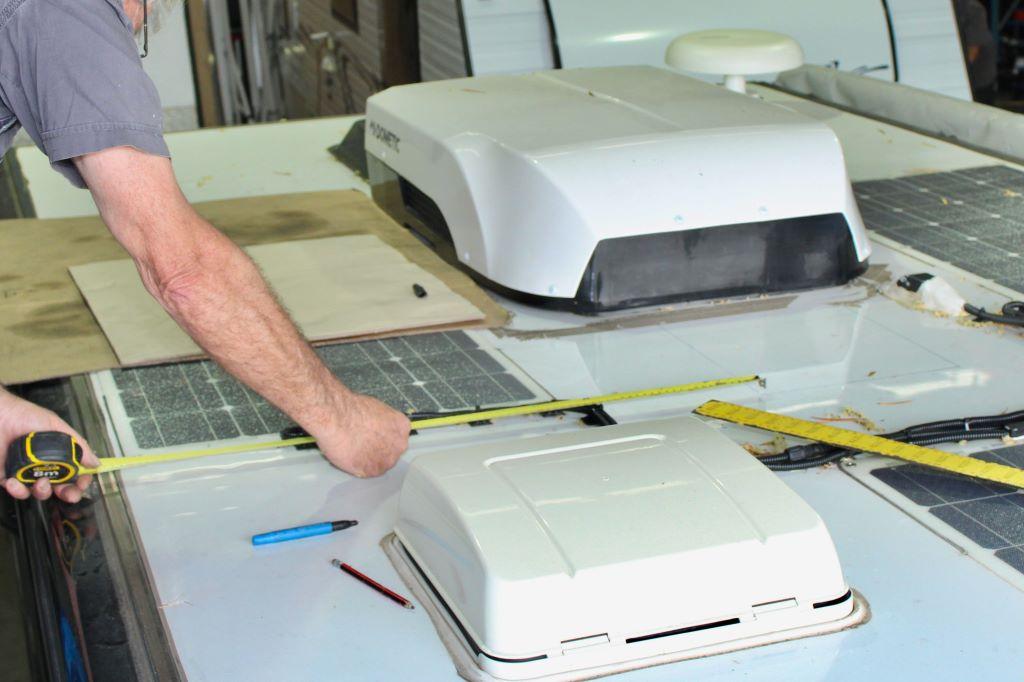
a. Detailed steps on how to remove the old skylight: Removing the old skylight is a meticulous process that involves unscrewing and carefully detaching it from the caravan roof without causing additional damage. Begin by gently removing any sealant or adhesive that binds the skylight to the roof using a utility knife or scraper. Subsequently, unscrew and cautiously lift the skylight, ensuring that no residual parts are left behind. It’s imperative to handle this step with utmost care to prevent damage to the surrounding areas and to ensure a smooth installation of the new skylight.
b. Installing the new skylight: The installation of the new skylight should be approached with precision to ensure a snug fit and airtight seal. Place the new skylight into the designated space, ensuring it aligns perfectly with the opening. Utilize screws to secure it in place and apply a generous amount of sealant around the edges to prevent potential leaks. It’s crucial to follow any installation guidelines provided by the skylight manufacturer to ensure optimal functionality and durability.
Post-Installation Checks
a. Checking for leaks and proper installation: After installing the new skylight, conducting thorough checks for any possible leaks is paramount to prevent water damage in the future. This involves inspecting the sealant application for any gaps and ensuring the skylight is securely fastened. Additionally, checking the interior for any visible light penetrating through the edges can also indicate areas that may need additional sealing to ensure a watertight fit.
b. Ensuring functionality and safety: Ensuring that the skylight opens, closes, and locks securely is crucial for both functionality and safety. Testing the locking mechanism ensures that the skylight will remain securely closed during transit, preventing potential accidents. Additionally, ensuring that the opening mechanism operates smoothly and securely will guarantee that the skylight provides adequate ventilation when needed, contributing to a comfortable living environment within the caravan.
Maintenance Tips
a. Regular checks and maintenance tips for longevity: To ensure the longevity of your new skylight, regular checks and maintenance are essential. This involves inspecting the sealant for wear and potential leaks, ensuring the opening mechanism operates smoothly, and checking for any signs of damage or wear. Cleaning the skylight regularly to remove any debris or buildup will also ensure that it continues to provide clear views and maximum light penetration, enhancing the overall caravan experience.
b. Cleaning and ensuring the skylight remains in optimal condition: Cleaning the skylight involves using non-abrasive cleaners and a soft cloth to prevent scratches and maintain clarity. Additionally, lubricating the opening mechanism periodically will ensure smooth operation and prevent wear. It’s also advisable to check and tighten any screws or fittings during regular maintenance to ensure the skylight remains securely in place, providing a safe and stable environment within the caravan.
Troubleshooting Common Issues
a. Addressing common problems that might arise post-installation: Post-installation issues, such as difficulty in opening/closing the skylight or minor leaks, might occur. Addressing these issues promptly can prevent further complications. For instance, a skylight that doesn’t close properly might require adjustments to the locking mechanism or hinges. Similarly, minor leaks might indicate a need for additional sealant or a review of the installation process to identify and rectify any errors.
b. Solutions and when to seek professional help: While minor issues can often be resolved with a bit of troubleshooting, recognizing when to seek professional help is crucial to prevent further damage. If the skylight continues to leak despite additional sealing, or if the structural integrity is compromised, consulting a professional can provide a safe and effective solution. Professionals can accurately diagnose and rectify issues, ensuring the longevity and functionality of the skylight.
Legal and Warranty Information
a. Understanding the legal aspects of modifying a caravan: Modifying a caravan, including replacing a skylight, may be subject to certain legal considerations, such as maintaining structural integrity and ensuring safety during transit. It’s crucial to adhere to any legal guidelines and standards related to caravan modifications to ensure safety and compliance. This might involve ensuring the skylight is securely installed and does not compromise the structural stability of the caravan.
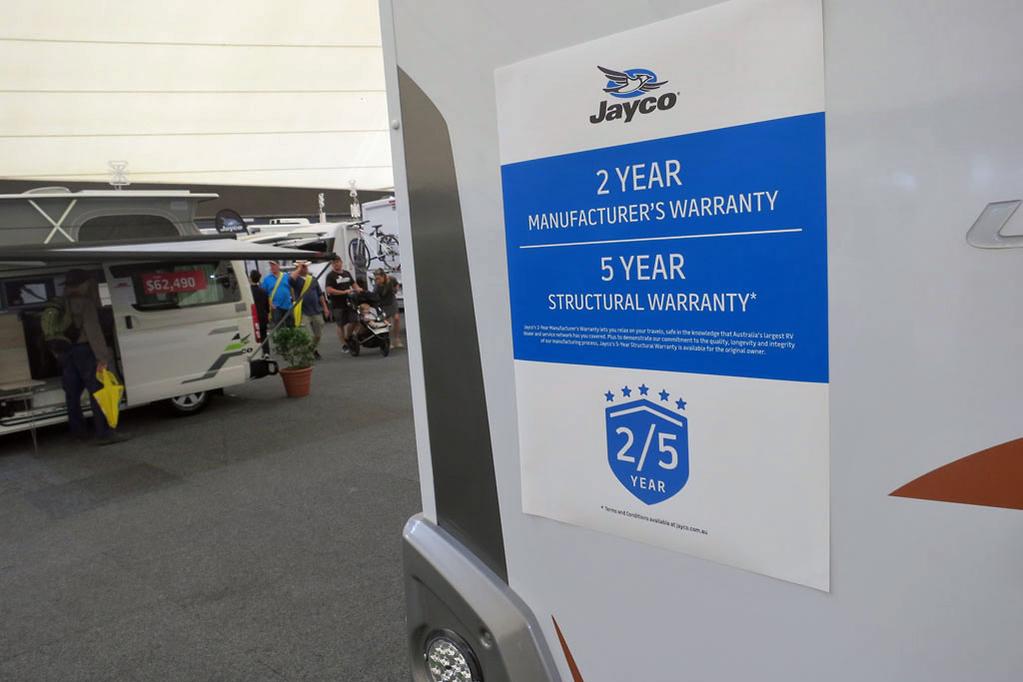
b. Warranty information on new skylights: Understanding the warranty information of your new skylight is pivotal to safeguard against manufacturing defects and to ensure support in the event of issues. Ensure to thoroughly read and comprehend the warranty documentation, paying attention to the duration and what aspects it covers. Retaining the purchase receipt and warranty card is also crucial to avail of the warranty services, providing peace of mind and assurance in your investment.
Conclusion
a. Summarizing key points: Concluding your article by summarizing the key points provides a quick recap for the readers and reinforces the crucial aspects of replacing a caravan skylight. Highlighting the importance of each step, from recognizing when a replacement is needed, through the installation process, to post-installation checks and maintenance, provides a comprehensive overview and reinforces the information provided throughout the article.
b. Additional resources or references: Providing additional resources or references at the conclusion offers readers avenues for further reading and assistance. This might involve directing them to professional skylight installers, suppliers, or additional reading materials that delve deeper into specific aspects of skylight replacement and maintenance. Ensuring that these resources are credible and relevant enhances the value of your article, providing a thorough and informative guide for your readers.